
As an Amazon Associate I earn from qualifying purchases. Affiliate disclosure.
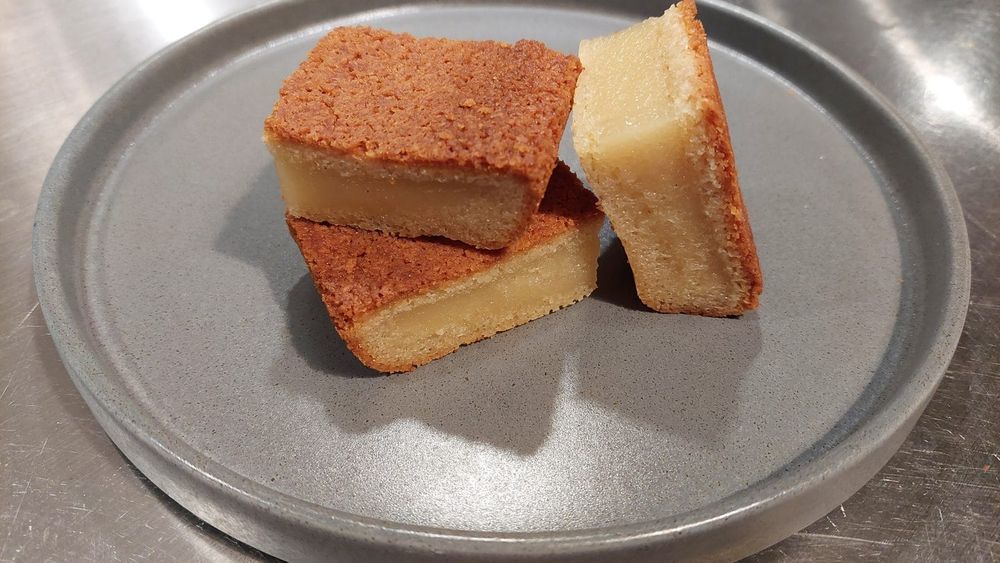
Butter mochi is the sweet that turns up at every Hawaiian potluck, and for good reason: crisp, caramelised edges, a soft, bouncy middle and a flavour that is pure butter and coconut. It takes ten minutes to mix in two bowls and the oven does the rest. Too many modern versions swap the butter for vegetable oil or margarine. Do not. The butter is in the name for a reason.
Why butter and coconut milk?
Butter browns against the hot tin and gives the dark, toffee-ish crust everyone fights over, while the milk solids keep the middle tasting like custard rather than plain sweet rice. Use a good salted or unsalted block; a cultured or grass-fed butter such as Kerrygold gives a deeper flavour. Full-fat tinned coconut milk adds richness and that unmistakable island taste, the same pairing you get in our haupia coconut pudding. Check the tin's label: coconut milk should be coconut and water, perhaps with a stabiliser, and no added oils.
Makes: 24 squares · Prep: 10 minutes, plus at least 2 hours cooling · Cook: 60–70 minutes
Ingredients
- 115g unsalted butter, melted and slightly cooled, plus extra for the tin
- 450g mochiko (glutinous sweet rice flour)
- 400g caster sugar
- 1 tsp baking powder
- ¼ tsp fine salt
- 4 large eggs, at room temperature
- 1 tin (400ml) full-fat coconut milk, well shaken
- 480ml whole milk
- 2 tsp vanilla extract
- Desiccated coconut, to sprinkle (optional)
Method
- Heat the oven to 175°C (155°C fan, gas 3½). Butter a 23 x 33cm (9 x 13 inch) baking tin generously, right into the corners.
- Whisk the mochiko, sugar, baking powder and salt together in a large bowl so there are no lumps.
- In a second bowl, whisk the eggs, then whisk in the coconut milk, whole milk, vanilla and melted butter until smooth.
- Pour the wet mixture into the dry and whisk until you have a smooth, runny batter with no dry pockets. It will be much thinner than a cake batter; that is correct.
- Pour into the tin, tap it on the worktop to pop any large bubbles and scatter over a little desiccated coconut if you like.
- Bake for 60–70 minutes, until the top is deep golden brown and a skewer pushed into the centre comes out clean. The edges should be dark and crisp, which is the best bit.
- Leave to cool completely in the tin, at least 2 hours. Cut it warm and it will be gummy and sticky; cooled, it sets to a clean, bouncy chew. Cut into squares with a plastic or buttered knife.
Tips
- Be patient with the cooling. Butter mochi cut hot is a sticky mess; cooled, it slices cleanly.
- Want more crispy edges? Bake it in a muffin tin, buttered well, for about 35–45 minutes. Every piece gets a crust.
- For a flavour twist, add 2 tbsp cocoa powder to the dry ingredients, or swap 120ml of the milk for strong brewed coffee.
- If you love chewy coconut desserts, try kulolo, the Hawaiian taro and coconut pudding, or browse more bakes in our seed-oil-free baking guide.
This is the kind of recipe we gathered for Savor Hawaiian, our collection of island favourites cooked without seed oils.
FAQ
What is butter mochi?
It is a Hawaiian baked sweet made from glutinous rice flour, butter, eggs, sugar, coconut milk and milk. It sits somewhere between a custard and a cake: crisp and golden on the edges, soft and chewy in the middle. You will find it at bake sales, potlucks and family parties across the islands.
Is mochiko the same as ordinary rice flour?
No, and the swap will not work. Mochiko is made from glutinous (sweet) rice, which is what gives the chew. Ordinary rice flour bakes up crumbly and dry. Look for the words sweet rice flour or glutinous rice flour on the bag.
Why butter rather than oil?
Butter gives the caramelised, toasty flavour on the crust and the rich custardy taste in the middle. Plenty of recipes use vegetable oil or margarine to save money; we do not, because the flavour is flatter and we cook without seed oils. Butter is the original choice and the better one.
Is butter mochi gluten free?
Despite the name, glutinous rice contains no gluten; the word refers to its sticky texture. Check the labels on your baking powder and vanilla if you are cooking for someone who must avoid gluten strictly.
How do I store it?
Keep it covered at room temperature and eat it within a day or two, when the texture is best. It firms up in the fridge; let it come back to room temperature, or warm a square briefly, before eating.
Can I make it in a smaller tin?
Halve everything and bake in a 20cm square tin for about 50–60 minutes, checking with a skewer. A deeper layer needs longer, so go by the colour on top and a clean skewer rather than the clock.
More ideas: Spam musubi in butter · haupia · seed-oil-free desserts.
African, Hawaiian, Indian, Mediterranean, Asian, Exotic, Chicken, Rice, Cookies, Coffee, Spices, Plants, World Cuisine, 30-Minute Dinners and more.
View All Books on Amazon →